Showing posts with label graphics. Show all posts
Tuesday, July 17, 2012
Blog Design {Little Bunny Quilts}
Remember my blog design giveaway...well, I am slow to deliver, but I finally finished Alison's blog, Little Bunny Quilts! She wanted citrus and wine colors, I had a difficult time choosing, but with a little help, we decided on these!
I also experimented with the sidebar title images {tutorial coming soon} and the dashed line around the menu buttons {it took a ridiculous amount of effort to get those little lines, but I love them!}.
Design Stats:
Template: Blogger Simple White with some edits
Fonts: Stitch and Janda Romantic
Graphics: Bunny
Tuesday, May 29, 2012
how to add a watermark to photos {tutorial}
Okay, for starters...it seems that whenever I mention watermarking, Pinterest, or Flickr, people assume that I am super worried my photos are going to be stolen, and they kindly remind me {please note, I am not being sarcastic, I think they have the best intentions!} that, in spite of my best efforts, my pictures can still be stolen...
I actually go back and forth on whether I need to {or even do} mark my photos. But, now with Pinterest and things getting pinned without linking back to their original sources correctly, I like to have my blog stamped on my pictures, then, if someone sees them, they can find me!
Whew...glad to get that out there, now, on to the good parts, how to make a watermark!
The method I use to watermark C&V photos is Picasa. Since Picasa is a super easy to use photo editing software, and it is downloaded on my computer, it is my tool of choice. And adding a watermark is easy!
| Choose your font color and size |
| Adjust transparency (if desired) |
| Afterwards you can easily remove the watermark by choosing "undo save" |
To make your watermark unique, pick out a great font and you're set!
If you want a more complex watermark, with some sort of shape or image, multiple colors or fonts, etc., you will need a picture editing program that can work with layers . Here are two favorites:
![]() |
| Use on the Web |
![]() |
| Download |
Personally, I use GIMP, I've known about it longer than I've known of Pixlr, so I'm familiar with the interface. However, they're both very similar. If you don't want to download a new program, then Pixlr is a great option. For this post I'm just going to show you how to use GIMP to put a watermark on your photos.
| First, open the image you want to watermark |
| Then open the watermark as layers |
| Use the "Move Tool" to adjust position |
| Use "Scale Layer" to adjust only the layer size |
| Adjust transparency if desired |
Then, save your picture! Note: You will need an image with a transparent background for the watermark, but I shared a tutorial for that yesterday, just click here! Questions? Want a simple watermark? Just let me know you're a follower and I'll do a drawing for a few free watermark images!
Monday, May 28, 2012
how to make a transparent image {tutorial}
As a precursor to my watermark post, I'm going to show you how to make a transparent image to use as a watermark or signature! I'll be using GIMP, a Photoshop-like-program that allows working with transparencies and layers.
First, open a new, transparent, image {I like to adjust mine to 300 px/in}:
Then chose the "Font Tool" and select a font {I'm using Sketch Rockwell}:
Type your text and adjust size and color if desired {since I'm making a watermark, I'm choosing white}:
Add other images/doodles {I'm using the letter "I" from Pea Betsy's Doodles font, then choosing "Flip Horizontal" to change the orientation}
Adjust positioning by using the "Move Tool" {I also freehanded a dotted line using a brush I made with adjusted spacing}:
When all layers are in position, crop image to selected size:
Then, this is where the newest GIMP is a little odd, choose "Export" to save the file as a ".png", this will allow you to keep the transparent background:
Type the name for the file followed by ".png" to save the image and you're done!
I'll be back tomorrow with how to add your new watermark to your images!
First, open a new, transparent, image {I like to adjust mine to 300 px/in}:
Then chose the "Font Tool" and select a font {I'm using Sketch Rockwell}:
Type your text and adjust size and color if desired {since I'm making a watermark, I'm choosing white}:
Add other images/doodles {I'm using the letter "I" from Pea Betsy's Doodles font, then choosing "Flip Horizontal" to change the orientation}
Adjust positioning by using the "Move Tool" {I also freehanded a dotted line using a brush I made with adjusted spacing}:
When all layers are in position, crop image to selected size:
Then, this is where the newest GIMP is a little odd, choose "Export" to save the file as a ".png", this will allow you to keep the transparent background:
Type the name for the file followed by ".png" to save the image and you're done!

I'll be back tomorrow with how to add your new watermark to your images!
Saturday, March 24, 2012
Etsy Shop :: Damsels & Dragons
![]() |
| Shop Banner |
I did an Etsy shop set for a friend of mine{a real life friend at that!} over the last few weeks, so I thought I'd share it with you {if you visit, you'll notice this is where Norah gets some of her headbands!}.
![]() |
| Avatar |
![]() |
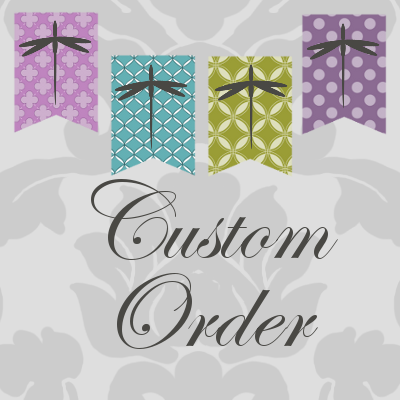
| Custom Order Graphic |
![]() |
| Business Card Back |
Monday, February 27, 2012
this and that
I did my first photography session of kids other than my own a couple weeks ago! My friend mentioned to me {not knowing that I am looking for photography practice} that she still hadn't taken her son in to get his pictures done since he turned 4. I offered to take a few for her, since I need the practice.
We got out of the house early, hoping to get some nice light {it is usually overcast in the mornings, it figures the sun was nice and bright the day we chose!}, so some of the photos were more washed out than I had wanted. But, overall, I think they turned out pretty good for a first-time. This is one of my favorites!
I also designed this button after some of the Farmer's Wife quilt blocks for a blogging friend of mine's new series: Farmer's Wife in Your Life Once I looked more closely at the blocks, I realized how easy they would be to turn into graphics!
And, I've been behind in posting the results of the giveaway, but the winner is:
Alison of Little Bunny Quilts! I will be designing a new blog for her {and I may draw another winner or two in the next couple of weeks...we'll see how busy I am!}, how fun!
Labels:
blog design,
click.,
graphics,
photography,
snap.
Subscribe to:
Posts (Atom)